Want to give your Ikea furniture a fresh look? Start by disassembling it for easy access, and don’t forget to clean every surface with Simple Green! After that, sand it down for better paint adhesion. Then, grab a shellac-based primer for a smooth finish, apply thin coats, and let it dry completely. Once it’s primed, choose a fun chalk or mineral paint color. Excited to see your masterpiece? Stick around, and you’ll discover even more handy tips!
Key Takeaways
- Disassemble your Ikea furniture and keep hardware organized for easier access during painting and reassembly.
- Clean surfaces thoroughly with Simple Green or a similar solution to promote paint adhesion.
- Sand with 120-grit followed by 220-grit sandpaper for a smooth finish before painting.
- Apply a shellac-based primer for best adhesion on laminate surfaces before painting.
- Use quality paintbrushes or foam rollers for even application, allowing adequate drying time between coats.
Materials Needed for Painting
When it comes to painting IKEA furniture, having the right materials can make all the difference. First off, you’ll want a solid shellac-based primer like Zinsser B.I.N. for those tricky laminate surfaces. For your paint colors, go with chalk or mineral paint—they’re perfect for this kind of project! Remember that selecting the right material quality can significantly impact the durability and finish of your painted piece.
Don’t forget a top coat! A polycrylic sealer will protect your finish types and keep everything looking fresh. Cleaning is key, so grab some Simple Green and a tack cloth to prep your piece.
What about tools? You’ll need good paintbrushes and a foam roller for smooth coverage. And of course, drop cloths—unless you enjoy cleaning paint off your floor! Ready to get started? Let’s paint!
Disassembling Your Furniture
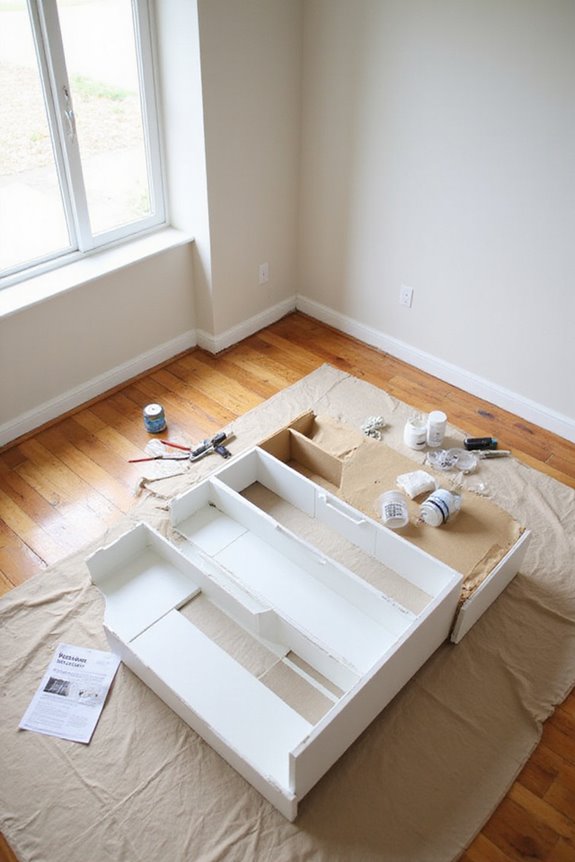
Now that you’ve gathered your materials and prepped your workspace, it’s time to take a closer look at your IKEA furniture. Did you know that disassembling your furniture has big disassembly benefits? It makes painting all surfaces much easier! Start by gathering the right tools, using screwdrivers or Allen wrenches as needed. Remember, tool safety is key—lay down a soft drop cloth to protect your furniture.
Begin by removing the shelves, drawers, and doors. Don’t forget to take photos as you go! Label each piece and keep hardware in resealable bags. It’s a great way to stay organized! Choosing nightstands with stylish designs can also inspire your color choices. By the time you’re done, you’ll have everything ready for that fabulous new paint job! Exciting, right?
Surface Preparation Techniques
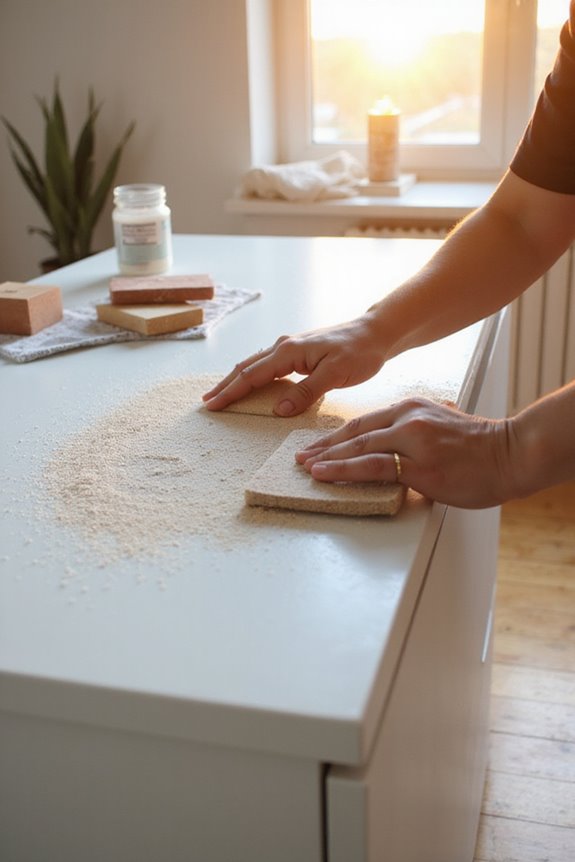
Getting your IKEA furniture ready for a paint job involves several essential steps—you’re going to want to get this right! First, clean your surfaces with effective cleaning solutions like Simple Green or Krud Cutter. Use a damp cloth to wipe down the furniture afterward. Why go through all that? It helps the paint stick better!
Next, let’s talk sanding methods. Start with 120-grit sandpaper to roughen the surface, then switch to 220-grit for a smoother finish—easy enough, right? Remember to remove any dust afterward with a damp cloth. These prep steps guarantee your furniture looks fantastic after painting! Additionally, ensuring a smooth, well-prepped surface can significantly enhance the overall appearance of your finished project. What’s not to love about a smooth, well-prepped surface? You’ve got this!
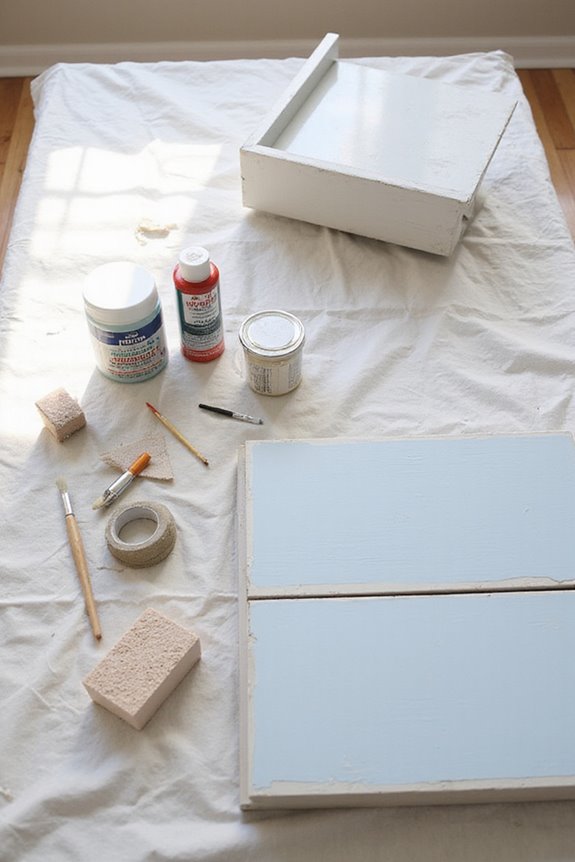
Priming Your Ikea Furniture
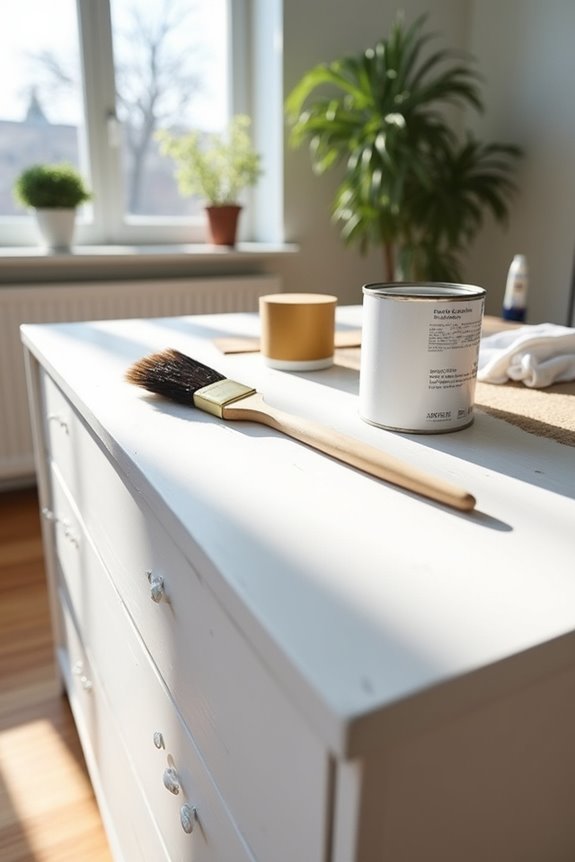
Priming your IKEA furniture is a game changer—trust me! You can’t skip this vital step if you want paint that lasts. Grab a shellac-based primer like Zinsser B.I.N.; it sticks like glue to laminate surfaces. Just remember, water-based or oil-based primers? They’re a no-go!
When you apply your primer, thin coats are the way to go. Too thick, and you risk uneven drying. After each coat, let it dry completely—patience pays off! Ever tried using a foam roller or a paintbrush for that smooth finish? It makes all the difference! And don’t forget: verify your surface is clean before you begin! Proper priming not only enhances adhesion but also boosts the durability and appearance of your final paint job. Excited yet?
Choosing the Right Paint
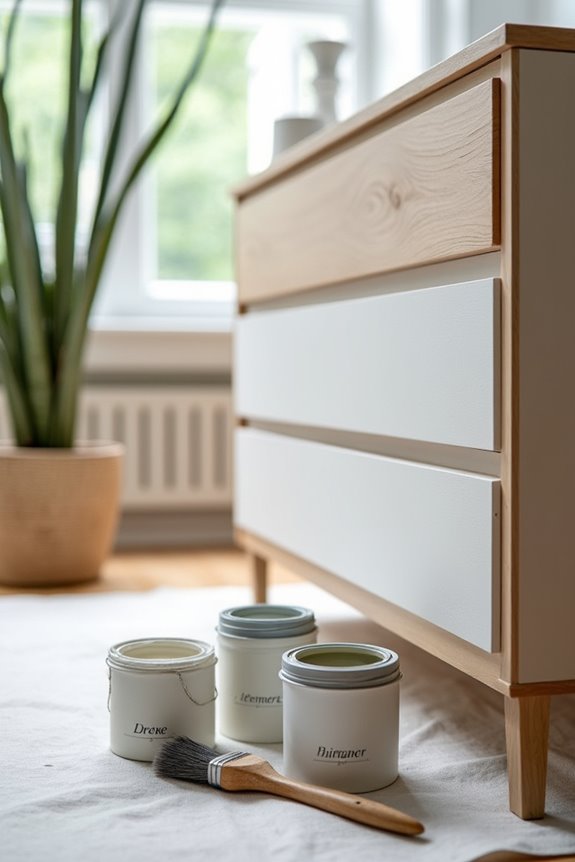
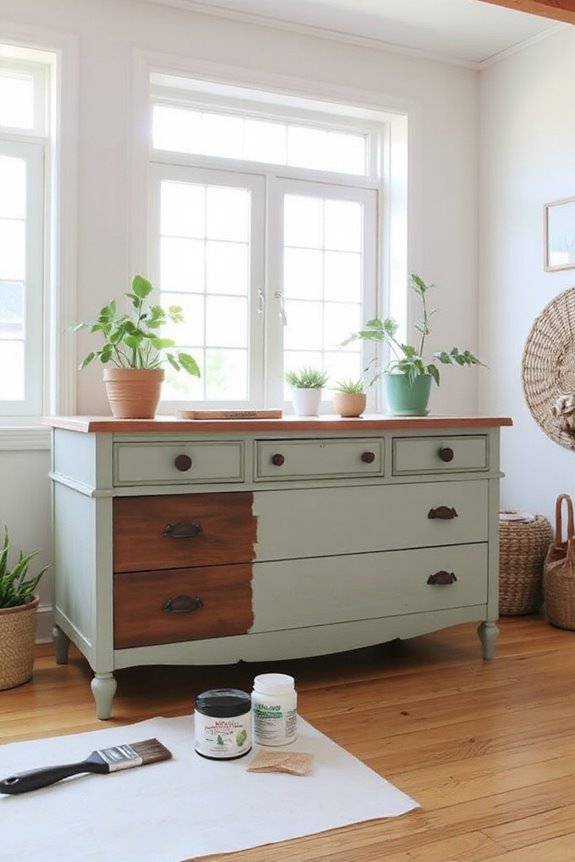
Choosing the right paint for your IKEA furniture can feel like a bit of a puzzle, but it doesn’t have to be! Start by considering paint types. Latex paint is perfect for beginners—easy cleanup and less smell! Chalk paint gives you a rustic vibe without needing a primer, though it might need a topcoat for durability. Got eco-friendly goals? Mineral paint is your go-to!
Now, what about paint finishes? Aim for an eggshell finish for a balance of sheen and durability. This usually works great for furniture that’ll see a lot of action! With so many options, have fun picking the perfect combo for your project! What’s your style? Let’s get creative!
Painting Techniques and Tips
When it comes to painting IKEA furniture, a little preparation goes a long way! Start by cleaning your piece with Simple Green to get rid of dirt. Feel like a pro? Lightly sand the surface with 120-grit sandpaper to help the primer stick better. Using a shellac-based primer, like Zinsser BIN, is essential for laminate surfaces—trust me on this one!
You’ve got your colors picked out, right? Consider different finish types—like a sleek eggshell or matte solution—for your desired look. For application, grab a dense foam roller for large areas and a brush for details. Don’t forget to remove hardware to avoid mishaps! Are you ready to transform that furniture masterpiece? You got this!
Sealing and Protecting the Finish
You’ve transformed your IKEA furniture with fresh paint, and now it’s time to give that masterpiece the protection it deserves! Choosing the right sealant types is key. Options like Minwax Polycrylic or General Finishes Topcoat offer great durability and scratch resistance. Ever tried a spray sealer? It’s quick! But remember, brush-on techniques give you more control.
Before applying, lightly sand the surface for a smoother finish. Apply your sealant using long, even strokes. Patience is essential—let it dry completely before adding more coats. Want it to last? Allow the sealant to cure for at least 48 hours before using it! That’s how you keep your furniture looking fabulous. Who knew protecting your art could be this easy?
Common Mistakes to Avoid
Although painting IKEA furniture can be a fun project, there are common mistakes that can really trip you up! Did you know that inadequate sanding can lead to paint peeling off? Make sure you don’t skip this essential step! And when you do sand, remember the right grit matters; starting too coarse can ruin your surface!
You also don’t want to rush application. Allowing enough drying time is key to a great finish. And be mindful of those application errors—overloading your brush can create a lumpy mess!
Lastly, always check for dust before painting. Even little things can make a big difference. So, take your time, and you’ll end up with beautiful results! Happy painting!
Frequently Asked Questions
Can I Paint Over Already Painted Ikea Furniture?
You can definitely paint over already painted Ikea furniture; just remember, a stitch in time saves nine! Make certain you prep surfaces properly and use suitable paint types for a lasting, beautiful finish.
How Long Does the Entire Painting Process Take?
The painting duration varies based on complexity, but expect at least 4-6 hours, including preparation time for cleaning, sanding, and applying coats. More intricate projects can take a full day or more.
What Type of Primer Is Best for Laminate Surfaces?
When it comes to laminate makeover magic, Zinsser BIN and Kilz are your best laminate primer options. For effortless application, remember to sand lightly between coats for that perfect finish and strong adhesion.
Is It Safe to Paint Indoors?
Yes, it’s safe to paint indoors if you guarantee good indoor ventilation and follow safety precautions. Use fans to keep air moving, wear masks, and protect your surfaces to minimize health risks.
How Do I Clean Paint Brushes After Use?
To clean your brushes, use effective brush cleaning techniques like rinsing under water, applying mild soap, and ensuring thorough paint removal methods. Always reshape damp bristles and store them properly for longevity and peak performance.